Clay Sculpture at the Israel Museum

If you've followed my blog since back in 2009, you may have seen photos of one of my sculptures. It hangs out in my Gallery Downstairs nowadays. It comes with a story...

And I have made other figurative sculptures as well. But it has been some years since I worked that way.

At the Israel Museum in Jerusalem a week ago I came across this terra cotta young lady, reading, as bourgeois young ladies in the 1870s were sometimes depicted. By Aime-Jules Dalou. 

The guard did not mind when I got out my camera, so I walked all around and photographed her from various angles; sitting on her chair, engrossed in her book, all alone in her museum case. The clay (terra cotta is earthenware) was roughly modeled, yet she is remarkably lifelike all the same. Her face is smooth. She is as fresh a subject as if the model had just sat for the portrait last month.

(Woman Reading, 1874, by Aime-Jules Dalou. Collection of Israel Museum, Jerusalem)

From her tilted-up shoe to her engrossed reading, she is the very symbol of poised absorption.

I don't know if I'll do figurative sculpture again anytime soon, but this young lady makes me remember how exciting and fun it was, and how the hours flew while I worked with the clay in this way. 

Posted on August 21, 2014 .

Chanukia Quest

Chanukia- (definition) a Chanukah menorah. Sometimes spelled chanukiah. Plural: chanukiot.

It's been a long and varied effort over the past 29 years to make a well-designed and great-looking chanukia out of clay. So far, my efforts have been pretty amateur. 

Last week I saw some chanukiot in the Ha'aretz Museum in Ramat Gan, Israel. These are inspiring chanukia design thoughts again.

One was brass, by L.Y. Wolpert, from the 1950s. The petal aspect of the backsplash to the candle holders is great. The thing is so cute I want to give it a little hug.

(L.Y. Wolpert brass chanukia, 1950s. Ha'aretz Museum, Ramat Gan, Israel)

(L.Y. Wolpert brass chanukia, 1950s. Ha'aretz Museum, Ramat Gan, Israel)

Another brass chanukia I really like is this 1950s design, made to look like two olive leaves. This is right where my comfort zone lies, simple organic imagery crossed with functionality.

(Brass chanukia, ca. 1950. Ha'aretz Museum, Ramat Gan, Israel. Attributed, with a question mark, to Ya'alat Chen)

(Brass chanukia, ca. 1950. Ha'aretz Museum, Ramat Gan, Israel. Attributed, with a question mark, to Ya'alat Chen)

There was one ceramic one, as well, made from a thrown and altered bowl. I am thinking about how to throw this to accommodate oil instead of candles. 

(Stoneware or earthenware chanukia, made from a thrown and altered bowl, by Hanna or Hava Samuel of Kav Vasefel Ltd, ca. 2000. From the collection of Ha'aretz Museum, Ramat Gan, Israel.)

(Stoneware or earthenware chanukia, made from a thrown and altered bowl, by Hanna or Hava Samuel of Kav Vasefel Ltd, ca. 2000. From the collection of Ha'aretz Museum, Ramat Gan, Israel.)

August is the time- even kind of late- to think about things one will want to have finished by November.


Posted on August 20, 2014 .

This Kiln is For the Birds...

It's a bit of an ongoing jigsaw puzzle loading a bisque kiln. The pieces can touch, can fit lip to lip if they are of similar size, and small pots can fit between stacks of large ones. It's absorbing to figure out as it goes along, but it is SO unexciting it isn't funny.

Conversely, I do not seem to be able to load a bisque kiln often enough. New work! I want to see new work! But my pace is not the speediest. Also, it's been so humid that drying is going like the proverbial tortoise. I have a dehumidifier going in the kiln room where the rack of ware is standing. But still.

Some weeks are like that.

Drying their underglaze feathers on my slab roller table and socializing are a flock of new birds.

(Porcelain birds with underglaze colors, drying before being put into a bisque kiln. Photo: Mimi Stadler)

They will sit between the pots in the bisque kiln wherever there is space.


Posted on August 4, 2014 .

Kitchen Utensils in the Studio

Kitchen stuff that came downstairs:

Can punch

(another fine tool for making interesting marks in the fresh clay)

Spatula

(very useful for cleaning the interior of the glaze bucket)

Measuring cup

(people often want to know just how much each goblet holds)

Food scale- like all the rest, not hereafter to be used for food!

(1 lb. of clay makes a nicely sized, useful bowl.)

Scrubbies 

(great for washing out glaze pouring vessels and  tools)

Cake frosting decorative-edge thingies

(holding one of these against a pot that is revolving on the wheel, I can make neat or interesting indentations)

Worn out kitchen towels 

(old towels, aprons, and worn out shirts- perfect for studio use)

Yogurt cups

(I also use smaller yogurt containers as hump molds for kids to hand build vessels around)

Random texture items to make attractive impressions in clay 

(bubble wrap, a piece of vinyl table liner, and some orange stuff the contractor left)


It's a challenge NOT bringing all sorts of things to the studio to use or try out. I do meet the challenge. I need more room to work than to store things that turn out to have no function. But still, you never know when a texture opportunity will arise- so tempting to store some more lace...in case.

Posted on July 31, 2014 .

Dinner Plates on the Wheel- for Non-Brawny Potters

The clay I buy comes in 25-lb bags. So I can make five 5-lb plates from one bagful. 

As I am not a tall, brawny person, and I left age 30 behind some time ago, I look for shortcuts that will save wear and tear on the various parts of the body that work hardest in making pottery on the wheel, namely shoulders, lower back, neck and wrists. The following is a great way to  make bigger plates more easily.

Rather than get to work centering a 5-lb lump of clay, then pushing it down by manual force into plate position on the wheel head, I used a punch-down technique that was easier.

First, I put the big ball of clay roughly in the center of the wheelhead. I got the wheel rotating slowly. Starting from the center and working my way out to the edge, I thumped my fist on the clay in a rhythmic pattern as it revolved. In this way, I covered a 13" round circular batt (a board) on the wheelhead with a relatively even layer of clay about 1 3/4" thick. It was WAY less work than the regular raising and lowering when I center a bigger ball of clay. 

Then, using water and pressure as I would normally,  I "threw" the battful of pre-flattened clay, from the middle of the clay out to the edge of the batt. In essence, I was smoothing flat the fist-marks from the thumping that I used to spread the clay on the batt. The smoothing process brought clay out to overhang the edge of the batt. I easily cut off the uneven edge with a needle tool, which centered the mass (1-2-3!) into a truly circular disk. Voila, centering, with very little work!

Then I threw an indentation in the center. Raising, lifting and thinning the clay at the outer edge of the batt, it was simple to create a rim on the plate. The rim grew to extend past the edge of the batt. In this way in relatively short order I threw five plates of the same (13.5") diameter.

(The angle of the photo distorts them a little- they are actually all round and all 13 1/2" in diameter.)

Just FYI, after the porcelain lost enough moisture content to be firm and trimmable, and I was able to trim away clay from the foot, I weighed the 5-lb plates. They weighed between 2 lbs 8 oz  and 3 lbs 2 oz. When they are fired, meaning all water weight will be gone, they will weigh less.

I do know now that it really helps to have an electric wheel! And it helps greatly to have Youtube videos to "teach an old dog  new tricks".


Posted on July 28, 2014 .

Students

My first student on the electric wheel has a great capacity to focus. She tries to understand every movement necessary in the throwing of a pot, as if it were a note in an etude. Eventually she will be able to see that she can change the order of movements at will, and go backward and forward and up and down, and compose all sorts of pieces.

She has made great progress and wants to continue her lessons for another session-go-round, and so do I. Her first two glazed pots, small and very nice:

(love the way the glaze breaks over the cool trim marks on the taller pot, which is about 4" high)

(love the way the glaze breaks over the cool trim marks on the taller pot, which is about 4" high)

Tuesday I taught her about making plates on the wheel. Two hours flew by.

In the fall, I will have a couple of other students as well, also adults, friends who want to have sessions together to learn to handbuild pottery. (We will not be working on the wheel.) They don't know anything about it, except that it would be fun. They want creative distraction from their jobs, and my studio and I are a local resource. It WILL be fun, too.

The only downside? I will have to clean my handbuilding area and keep it clean. Oh, well. Nothing like positive motivation.

Teaching how to work with clay is something I have enjoyed on and off for twenty years, and it adds welcome balance to the rest of my studio life. 


Posted on July 23, 2014 .

Gallery Pot Configurations

Periodically I change the setups of pottery in The Gallery Downstairs. 

This freshens my perspective. 

It tells me what I'm short on and need to make.

I am not short of mugs, for example.

mug rack.JPG

But I'm short of certain Judaica, and I would also like to make some more serving trays.

Here are some gallery views, from all angles. 

(washing cups and serving trays)

(black and white, peach and charteuse)

(organic sensibility pots, plus a set of bowls- soup, side dish, and larger, sturdier mixing bowl)

(organic sensibility pots, plus a set of bowls- soup, side dish, and larger, sturdier mixing bowl)

(covered tree jar and sentinel cats)

Right now I'm having a good time making little animals, from the tiny to the merely small. The tiny ones I fashion in the palm of my hand. The small ones I make on the potters wheel and alter. They peek here and there from between the pots.

(tiny hedgehogs, cookie jar and serving platter)

(cat and mouse drama)


Last but not least, a young camper left me a "cookie" perhaps 15 years ago, that reappears with the teacups now and then.

(Tully's cookie...)


Posted on July 20, 2014 .

Making a Slump Mold on the Wheel

Some things come up pretty as a picture. These things, by contrast, are not exciting to look at. But what they will help me make is pretty great.

About 13.5" x 11", and no, they are not toilet seats... they are slump molds!

About 13.5" x 11", and no, they are not toilet seats... they are slump molds!

These are slump molds*. I am going to use them as supporting forms, to drape clay slabs into, so I can make really nice slab platters. And then I am also going to use them to drape other slabs into, to make... ah, imaginative things, like components of certain sculptural vessels. You may not see it now, but that is my plan. I made them in pairs, in four different sizes.

And because I am going to bisque fire these slump molds, I can use them again and again, to help turn fresh clay slabs into one-of-a-kind vessels.

(*What it is: A slump mold is any object with a supportive depression in it to allow a slab of clay to settle into it and take on the shape of the depression. When the resulting slab dish has firmed up some and will hold its shape, it gets removed from the mold and worked on further. These particular two slump molds are just  bottomless rings I made on the potter's wheel, then pulled into ovals with my hands.) 

I saw Suze Lindsay use a teeny version of this type of slump mold at the Women Working with Clay symposium I went to in the first week of June in Virginia. A bell rang in my head. Thanks, Suze!

Until now, I've used "found" or purchased objects as my slump molds. But I think this is more interesting. It gives me more freedom to invent because when I make a slump mold, I'm already  imagining the final product I'll make using it.

So I'm already thinking of the rim I will make on the platter I build resting on this mold, and the handles that will go on that platter- -  and I haven't even bisque-fired the mold or rolled out a slab to lay into it. And even further, I'm already thinking about how to make two matching oval dishes in a pair of these molds, and attach them rim-to-rim to make a hollow form... and what to further create with that hollow form.  I like that. These molds are going to be great**.

(**If they don't warp in the kiln when I fire them...)


Posted on July 17, 2014 .

Ric Pierce Makes a Platter- Video

I don't talk much about handbuilding in my blog, but in looking at plate-making videos I came across this one. It's fun, and a quick watch for those among us with a short attention span.

A simple plaster hump mold is used in Ric Pierce's video. Many were my campers (at Camp Simcha pottery-room 1994-2001; or, occasionally, students in my studio at home) who used simple plaster hump molds like this one, to build a basic bowl or plate shape. But none of my campers or students ever went so far as to make a platter like this one. 

Guess I'd better build some foot placement templates like the one Ric uses here, and get back to it! It's dead simple but way clever at the same time.

https://www.youtube.com/watch?v=ow-l3SyKds4

Love those handmade brushes he is using to glaze with, too. They make wonderful marks! 

Posted on July 6, 2014 .

Mark Peters Video

I was just checking out a Mark Peters video on Youtube, with him throwing a platter upside down on the wheel. Yes, I said upside down. If you've got about 6 minutes, you can see it done lots faster on this video than it would take in real time!

Go to it on this page- it's the first one on the roster of vids. 

http://www.pinerootpottery.com/videos.htm

Not everyone can handle 8 lbs. of clay as easily as Mark does here. He makes it look super easy. And if you wonder, the cheesecutter about a minute and a half in is being used to level the foot so that when the platter is turned upright, it won't rock.

All I can say to myself is, "Live and learn."

Posted on July 3, 2014 .

Stalking Cats

Since I was still sitting at the wheel with a big hump of clay in front of me, and I'd just made some birds, I went on and made some cats. They thought the bird choir I had just made looked delicious and immediately went into crouch-position. They are very well-fed and not energetic, so despite their best efforts, they will not catch the singing birds.

Here is the first cat, in three views:

porcelaincat1b.jpg
porcelaincat1c.jpg

And four views of the second cat:

porcelaincat2a.jpg
porcelaincat2b.jpg
porcelaincat2c.jpg
porcelaincat2d.jpg


These and a few more I "threw" on the wheel as closed forms, then I added noses, eyes, ears, legs and tails. I underglazed* these mischievous cats in mostly ridiculous colors, like blue, olive green, purple, bright yellow and orange, then fired, clear-glazed and fired them again. 

 I ran out of time before I could photograph the other three, and headed up to Maine for much-needed outdoor R&R. They sit in my little gallery awaiting my return. Bye for now, basement.

(* Underglaze is a form of glaze high in clay content. I use it on the unfired clay.)


Posted on June 26, 2014 .

'Women Working with Clay' Symposium, Day 3

Tomorrow after lunch, that's it. Monday afternoon through Thursday morning is the whole length of this symposium. Today, again, was intense. There was so much effort on the part of every presenter and symposium-goer to fit in as much creation and clay education as possible. Philosophies were flying. 

All the while, the clay faculty considered. Consideration after consideration. They pondered and weighed everything as they worked. (That's the making process when it isn't rote.)

Meredith Brickell involved the crowd in making tiny parts for the wall of an upcoming show. She let people take small bits of clay and make any little object they wanted. Meanwhile, she made tiny parts herself from kaolin and organic seeds and fibers, that looked like bent, old rusty nails. Meredith: memory.

meredithbrickel.jpg

Attendees became engrossed, and the room was calm.

attendee Renee made interacting parts

attendee Renee made interacting parts

with other attendees engrossed in their own freeform objects

with other attendees engrossed in their own freeform objects

attendeeclay3.jpg
considering formative possibilities

considering formative possibilities

Gwendolyn Yoppolo explained a handle she was making for a cup she made, which I believe was full of her generous spirit. Gwendolyn explored the human interactions involving food and feeding one another and the trust and generosity involved. Her forms are based on interaction between two or more people and some of her ideas involve performance of acts of feeding between two people.  

gwendolynyoppolocup.jpg

and Giselle Hicks mounded flowers in a blaze of beauty that drew us into its sheer floral whiteness. Giselle's explorations with flowers and highly patterned cast "pillow" forms explored the effect of beauty in the environment and the effect it has on people. She looks at more than what is "beautiful" but also at how "beautiful" affects the person who interacts with it.

giselleassembles.JPG

Meanwhile, Suze considered handles,

suzelindsayhandle.jpg

and the gesture created  by a bundle of twigs through white slip

suzelindsayhake.jpg

and whether to add more brushwork to the slip decoration on a pitcher;

suzelindsayslipdeco.jpg

and I caught the connection of color to clay as she added a dot of chrome slip that will turn black in the salt kiln:

suzelindsayslipdot.jpg

While Linda Sikora considered fit and shape of a lid

and what special bit more will make a lid finial feel right.

lindasikoralidknob.jpg

Linda explored writing, as well, in a breakout session during one of the days of the symposium. All the potters talked at least part of the time as they demonstrated. This was no passive experience. All through the symposium. thought processes were explored, about creating communication and interaction through clay and pottery vessels, whether theoretical or functional art; and five different yet somehow compatible philosophies of clay art gave much food for thought for all of us attending. 


'Women Working With Clay' Symposium, Day 2

If yesterday's half day was intense here at Holliins University at the Clay Symposium, a full day today was killer great. I staggered back to my room reeling with tiredness at 9 p.m., but upon uploading and looking through the day's photos, I felt recharged. So before exhaustion grabs me, I'm giving a shout-out to the symposium mastermind, Donna Polseno- wow as usual.

Donna keeping attendees informed so we can find our discussion groups this afternoon… Photo Mimi Stadler 2014

Donna keeping attendees informed so we can find our discussion groups this afternoon… Photo Mimi Stadler 2014

The format involves five clay artists. There are two wheel artists working in one big studio room, and three handbuilders in another.

Handbuilders, alphabetically:

Meredith Brickell, who interestingly enough was working on a a sculpture that would become an assemblage of bricks, symbolizing the impermanence of human existence and, conversely, the human desire to retain memory of prior humans. 

Meredith creating the 2' x 2' slump mold for her sculpture. She will drape a large slab into it to begin the actual piece. Photo Mimi Stadler 2014

Meredith creating the 2' x 2' slump mold for her sculpture. She will drape a large slab into it to begin the actual piece. Photo Mimi Stadler 2014

Meredith Brickell working with coils and pinching to create the walls of her bricklike sculpture. Photo Mimi Stadler 2014

Meredith Brickell working with coils and pinching to create the walls of her bricklike sculpture. Photo Mimi Stadler 2014

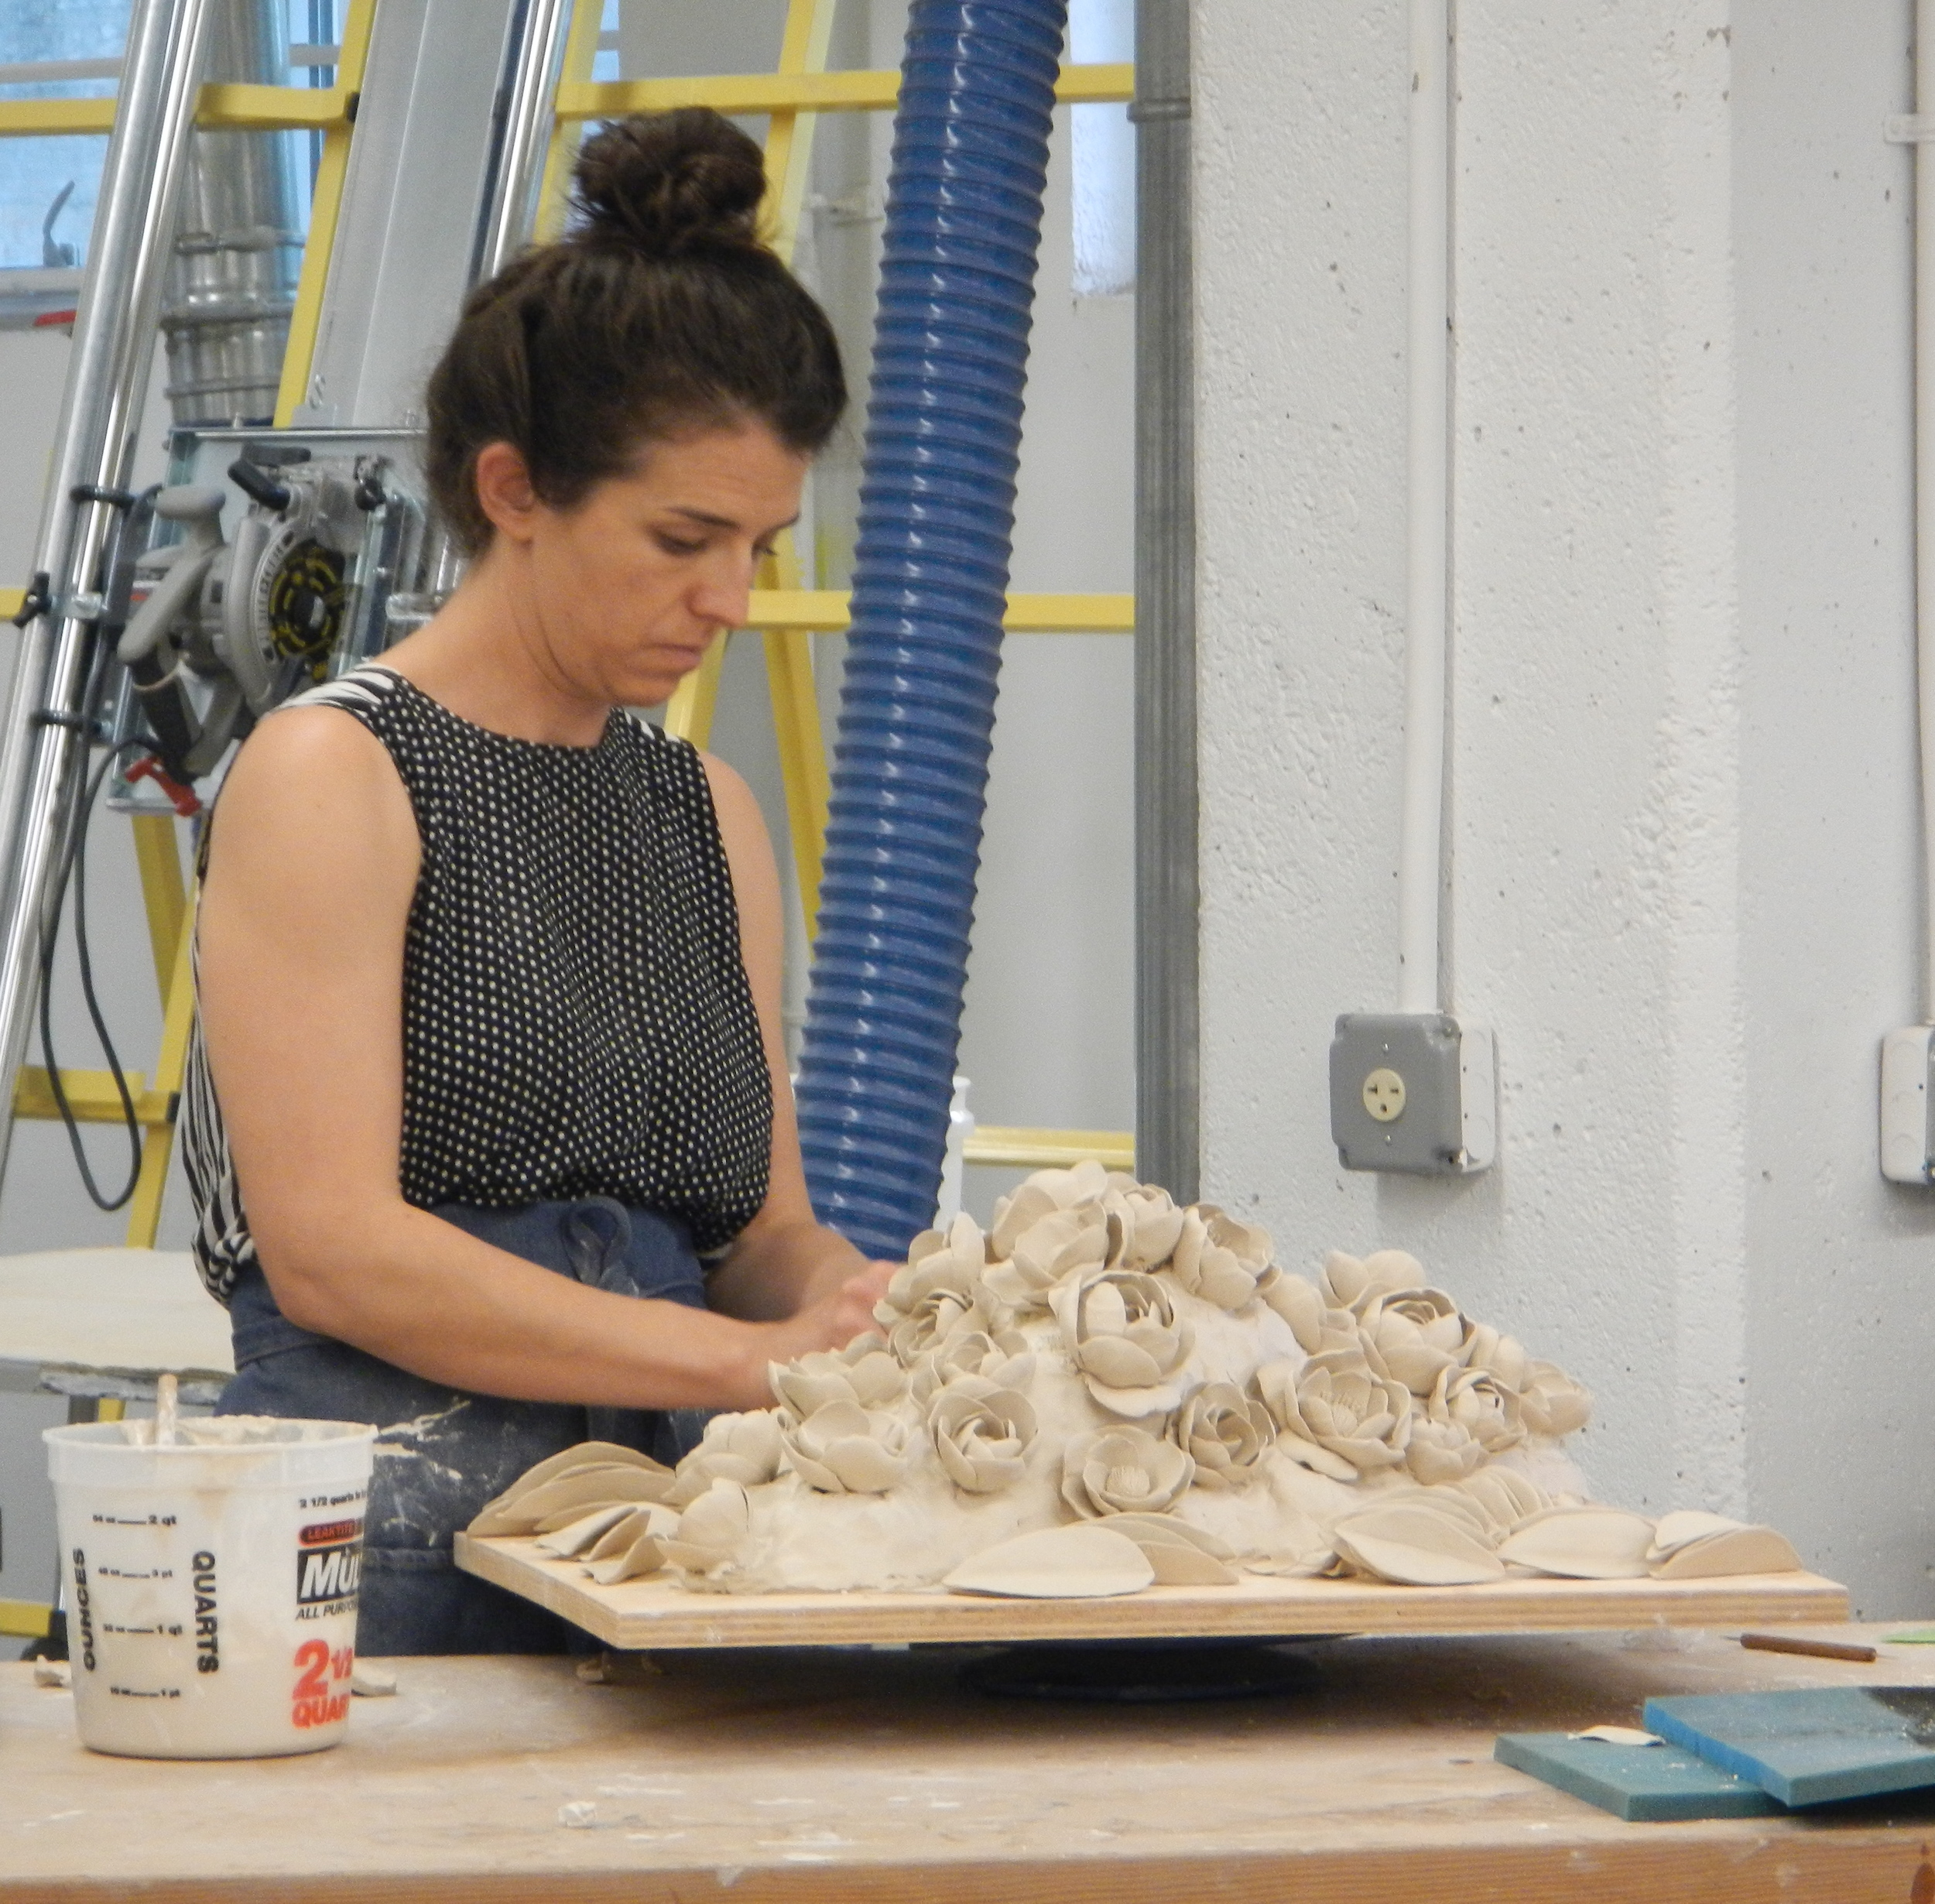
Giselle Hicks, working on a complex sculpture of massed flowers, which will be attached on a large handbuilt base. (The pillow form is one she makes often, with complex surface designs, but is not part of the sculpture-to-be.)

Giselle Hicks. Photo Mimi Stadler 2014

Giselle Hicks. Photo Mimi Stadler 2014

The petals for the flowers, pressed into Giselle's palm to give them the right curve.

The petals for the flowers, pressed into Giselle's palm to give them the right curve.

The petals build around these flower centers, made from coil components.

The petals build around these flower centers, made from coil components.

One of many that will be part of the sculpture.

One of many that will be part of the sculpture.

Gwendolyn Yoppolo, who pinched feeding-connected forms that were deceptively simple, and were based on a deep philosophical exploration of human relationships.

Gwendolyn Yoppolo pinching one of her vessels. Photo Mimi Stadler 2014

Gwendolyn Yoppolo pinching one of her vessels. Photo Mimi Stadler 2014

Vessels designed for people to feed one another!

Vessels designed for people to feed one another!

The wheel-throwers, alphabetically:

Suze Lindsay, seen here forming a pitcher from thrown and altered components:

Suze Lindsay showing thrown part for a large pitcher. Photo Mimi Stadler 2014

Suze Lindsay showing thrown part for a large pitcher. Photo Mimi Stadler 2014

Darting a thrown form to create a shoulder on the pitcher-to-be, which will be like the one to the right, only larger. Photo Mimi Stadler 2014

Darting a thrown form to create a shoulder on the pitcher-to-be, which will be like the one to the right, only larger. Photo Mimi Stadler 2014

And Linda Sikora, a potter exploring round forms:

Linda Sikora. Photo Mimi Stadler 2014

Linda Sikora. Photo Mimi Stadler 2014

Linda Sikora refining the lid gallery inside a round pot. Photo Mimi Stadler 2014

Linda Sikora refining the lid gallery inside a round pot. Photo Mimi Stadler 2014

Plenty of rest needed by all to refuel for Day Three!

Posted on June 10, 2014 .

'Women Working With Clay' Symposium in Roanoke, Virginia

How much do I love this symposium? Let me count the ways.

Even if I had not been here two previous years, I would find this amazing. Trust me when I say (although you may be aware already) that potters are not a dime a dozen. You may have heard me say that the life of a "basement potter" can be isolating. So shmoozing and confabbing with more than 30 potters and five presenters and a few more pottery assistants today was a blast, a gas, a zing of delight.

 Yesterday Susan, a friend from the NJ Potters' Guild, drove with me down to Roanoke, a seven-hour trip. We explored this cameo of a campus a bit early on. The symposium started this afternoon. 

Attendees gathered to see a slideshow of images we had each sent in advance, that in essence became our professional credentials. This is an act of courage for some, because while some of the potters and sculptors are very fine, some are recent arrivals to the art and craft of clay. They find out it doesn't matter. 

Dinner looked great. I am on a restricted diet the next four days of something like grape tomatoes, (okay, maybe a little more than grape tomatoes, but not much more). But the food looks very nice if you happen to be able to eat like a normal person this week. 

And after dinner came a presentation by Rahele. Filsoofi, originally from Tehran, Iran. Rahele, 39, is an accomplished artist and scholar who has worked in clay for years, as well as with other art media. She has lived in the United States for probably half her life, and made it her important work for the last two years to research and write about essentially unchronicled, unknown women potters in Iran. Her representative subjects were three women, from three regions of Iran, two of whom make and very successfully sell the same traditional food-preparation, cooking and serving vessels that have been made in the area for 3,000 years; and one of whom still uses the same clay of her birth region but makes sculptural, animal forms she dreams up (literally). The photos and story about those women, and their connection to the land around them and to traditional ways of life, formed a new narrative for the group hearing about them.

If we at the symposium can relate to these women making pots across the world, we can certainly find a basis for much conversation and exchange right here on one lovely Southern campus. That is what we did, in fact, socializing and finding out about one another's personal and professional lives over drinks into the late evening. 

Tomorrow, five American women, very fine clay artists all, will begin presenting their philosophies and techniques as we watch them make the work for which they are known. I'll save introductions to them and their work till then.

As ever, as at the last two of these symposia, there will be photos tomorrow, so rub your eyes and rest up. 

Crouching Cats and Singing Birds

What do crouching cats, singing birds, honey jars and tiny dishes have in common? 

They were all "thrown off the hump" on my potter's wheel.

unfired porcelain with underglazes, thrown off the hump and altered

unfired porcelain with underglazes, thrown off the hump and altered

unfired porcelain with underglazes; thrown off the hump and altered

unfired porcelain with underglazes; thrown off the hump and altered

four honey jars and four tiny bowls, thrown off the hump; unfired cone 6 porcelain

four honey jars and four tiny bowls, thrown off the hump; unfired cone 6 porcelain

I put a big hump of clay on the wheel. I centered just the top little bit. I made a bird body, which starts as a two-sphere snowman, a closed form.

Again, center just the top little bit. A three-sphere closed form will become a cat body.

Again, center just the top bit, and make a honey jar body.

Again; a lid for for the jar.

And so on! A large hump of clay is the start of many small building blocks for pots and sculptural forms.

Throwing off the hump. A great trick, a really useful skill!

(Then after throwing comes all the trimming, altering, embellishing, and coloring. But that's another story.)

Posted on June 2, 2014 .

A Student at the Wheel

I have a student. Since I have an electric wheel now, it seems like the right time. I am enjoying teaching. It's been a long time since I had a wheel student. 

My student's pots, with two already trimmed and drying, and the rest awaiting trimming. There are two covered jars!

My student's pots, with two already trimmed and drying, and the rest awaiting trimming. There are two covered jars!

I am reminded of my own wrestling with stoneware in Ceramics I in college, when I see this adult student grappling determinedly with individual ideas and motions and putting them together bit by bit into a whole process. I remember my own nascent desire to succeed at conquering the formless mass that is clay, and to put my own sensibility into it. It was hard. But I worked at it continually, and eventually I got it. My student will, too.

Working at the wheel is a metaphor for creative learning. You need to bring together body and mind to  produce an object on the potter's wheel. You need to hone both to make really good objects.

Posted on May 29, 2014 .

Making Hungry Cats on the Wheel

They started like this

(Just thrown "off the hump" like not very good looking snowmen- I will work on this form!)

(Just thrown "off the hump" like not very good looking snowmen- I will work on this form!)

And now they look like this! ("My, those birds look delicious. Let's catch some.")

And now they look like this! ("My, those birds look delicious. Let's catch some.")

Still working on this idea and interested in refining the figures. More to come. Stay tuned!

Posted on May 26, 2014 .

Singing Birds from Clay

Birds! 

The form is thrown on the wheel, shaped like a short, squat bowling pin.

A day later, when the form has become firmer, I coax the clay at the bottom into a tail shape, just like pulling a short handle from clay. I depress the "spine" area, and as I do so, either side seems to rise so that the bird has folded wings. Then I add a beak and eyes, and I open the beak so that the bird is singing. 

little birds freshly made from porcelain clay; wheel-thrown and altered

little birds freshly made from porcelain clay; wheel-thrown and altered

I think I will make a flock of these. They can sing all over my studio and gallery.

Posted on May 22, 2014 .

Infinite Forms

Although my childhood was not one with lessons in art or music, my older brother drew and I watched, absorbed. And then I began to draw. There were no lessons in art or music, but in our DNA is a blueprint for wondering how things work and a desire to make them do so. Add to that our childhood home beside and between woods and a love of nature they nurtured in us. Clay has been an exploration.  Put together these influences and you find the direction my art has taken me over time.

Clay is the stuff that symbolizes possibility. A formless mass, it can be made to take on infinite forms. 

That is my exploration for this week. Infinite forms.


Posted on May 19, 2014 .